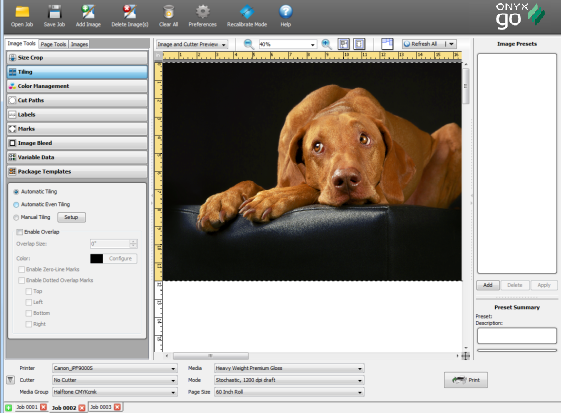
[Manual Tiling] allows you to create your own tiles for an image.
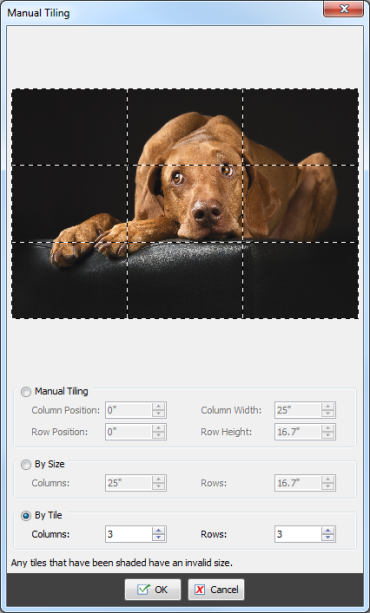
To use [Manual Tiling], select Tiling from Image Tools, check [Manual Tiling], and then click [Setup] button. This opens the "Manual Tiling" dialog (Figure 2).
[Manual Tiling] allows you to select from the following options:
- Manual Tiling —This option is tiling that you set yourself. You can set Manual Tiles by either dragging the tile boundaries to specific locations in your image or by inserting values into the [Manual Tiles] fields. To create more rows or columns of tiles, move your mouse to the edge of your image and drag the tile border onto your image. Use this option if you want to create tiles of varying sizes.
- By Size Tiles —This option creates rows and columns of tiles that are of equal size. Use the up-down arrows to set row and column (widths and heights). If your width or height is too large for your image, tiles will not appear. Use this option if you want to create only enough tiles to print an image larger than your media.
- By Tiles— This option creates rows and columns of tiles that are evenly spaced across your image. Use theup-down arrows to set the number of rows and columns for your image. Use this option if you want to create an exact number of tiles of equal size.
TIP: You can learn more about the manual tiling tool by watching the Manual Tiling video tutorial

 Automatic Tiling
 Related Topics
